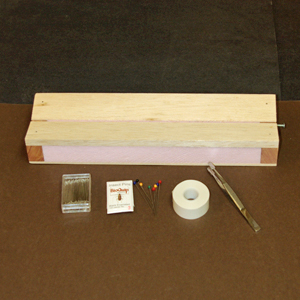
| Supplies for pinning
specimens can be purchased from Bio-Quip (
www.bioquip.com ) or another
supplier. The supplies include a spreading board ( size
depends on size of moth being spread), insect pins, straight
pins, and some kind of paper like wax paper cut into strips.
A pair of tweezers with wide tips (1/4 inch) are nice to
pick up the moths. |
 |
| The following instructions are for
pinning butterflies and moths. Other insects are similar
except in most cases the wings are not spread. To start spreading your specimens, insert
a pin into the center of the thorax perpendicular to the body of the insect. |
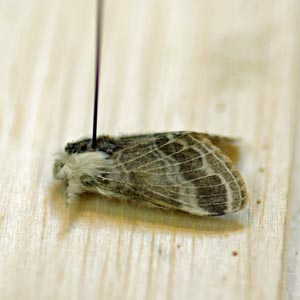 |
| Next complete the pin insertion by
placing the top of the specimen 1/4 inch from the top of the
pin. |
.JPG) |
Place the specimen into a spreading
board, with the wings touching the wood.
|
.JPG) |
| Place a pin on both sides of the abdomen
to keep the specimen from turning while spreading the wings. |
.JPG) |
| Use a small pin to pull the forward wing
till the aft side of the wing is at a 90 degree angle to the
body. Shove the pin into the wood to keep it in place. Note
that there is a hard vein running along the front of the
wing. Place pin behind this vein to keep from tearing the
wing. |
.JPG) |
| Take a second pin and pull the hind wing
forward till it is just under the front wing. Push pin into
wood. |
.JPG) |
| Perform same step on left wing as on
right wing. |
.JPG) |
|
Perform same step on left wing as on right wing. |
.JPG) |
| Place a strip of paper over paper and pin
as shown. Pins are placed at an angle to keep paper tight. I
like to put a pin on each side of each wing to ensure they
will not move after holding pins are removed. The paper can
be purchased from Bio-Quip or some other supplier. Wax
paper, cut into strips can be used but make sure the
specimen doesn't get too hot or wax may melt to wings. |
.JPG) |
| Apply paper to left wing. |
.JPG) |
| Remove pins holding abdomen and allow specimen to
dry for at least two weeks before removing. This will keep
the wings from drooping. |
.JPG) |
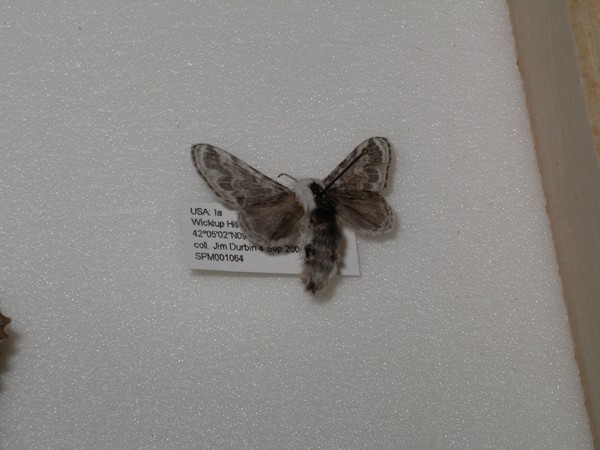
| This photo shows a specimen that has been pinned,
spread on a board and left for a couple of weeks to dry. It is then
removed and a label is attached showing where, when and who collected
the specimen. With the database I use to track my specimens, it also
adds a specimen number. After this the specimen is identified. The label
should contain the following information: Country, state,
location by name (may only be able to give a close reference
like a city), the GPS coordinates or township data from
something like a Sportmans Atlas, who collected the specimen
and the date. |
 |
|
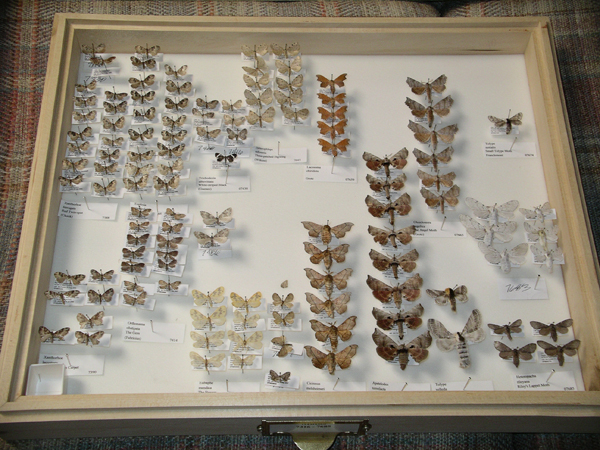
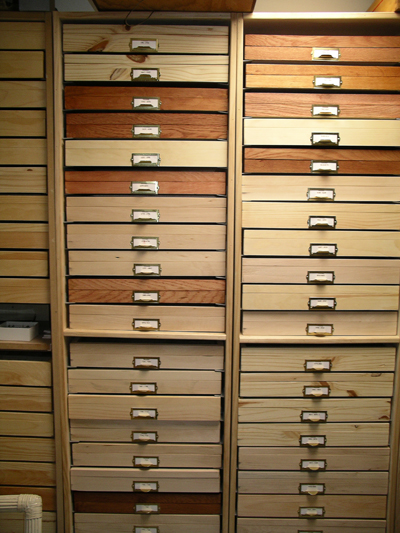
The specimen is then put in the proper drawer. My
moth specimens have been sorted by Hodges number. This is a number which
was assigned to the species by Ronald Hodges in 1983. He assigned a
number by taxonomic order for all Lepidoptera in North America, north of
Mexico. It is useful in that you have some method of sorting species.
Without the number, it would be in alphabetical order which doesn't
follow any taxonomy method. While changes have made some of the numbers
out of sequence by the new taxonomic data, it still provides an order. |
 |
|
The drawers are then placed in cabinets. The cabinets
are in my basement which is normally dark and the temperature stays at
about 60 degrees. Light and temperature will
cause specimens to lose their colors. If keeping a collection, try to
keep the specimens out of the light. Also put some kind of pest strip in
the drawers to keep out bugs. There is a beetle (dermestid beetles known
as carpet beetles and buffalo bugs), that can get into your
drawers and will eat your specimens. |
 |